To use green screen on TikTok, tap + to open the camera, tap Effects, choose Green Screen for a photo background or Green Screen Video for a moving one, pick the image or clip from your phone, and record. You don’t need a real green screen: the effect separates you from the room behind you in the camera. It works while you record in the TikTok app, with good front light and a steady phone.
This guide covers both TikTok effects, Green Screen Duet, how to get cleaner edges and what to check when the effect is missing. The last section covers a different job: putting a new background behind a video you already recorded, which TikTok’s camera effects don’t do. Effect names and steps come from TikTok’s own announcements and developer documentation. Icons move between app versions, so search the effect by name if it isn’t where described.
How to use green screen on TikTok
- Open the camera. Tap + at the bottom of the TikTok app.
- Open Effects. Tap Effects next to the record button and search for “green screen”.
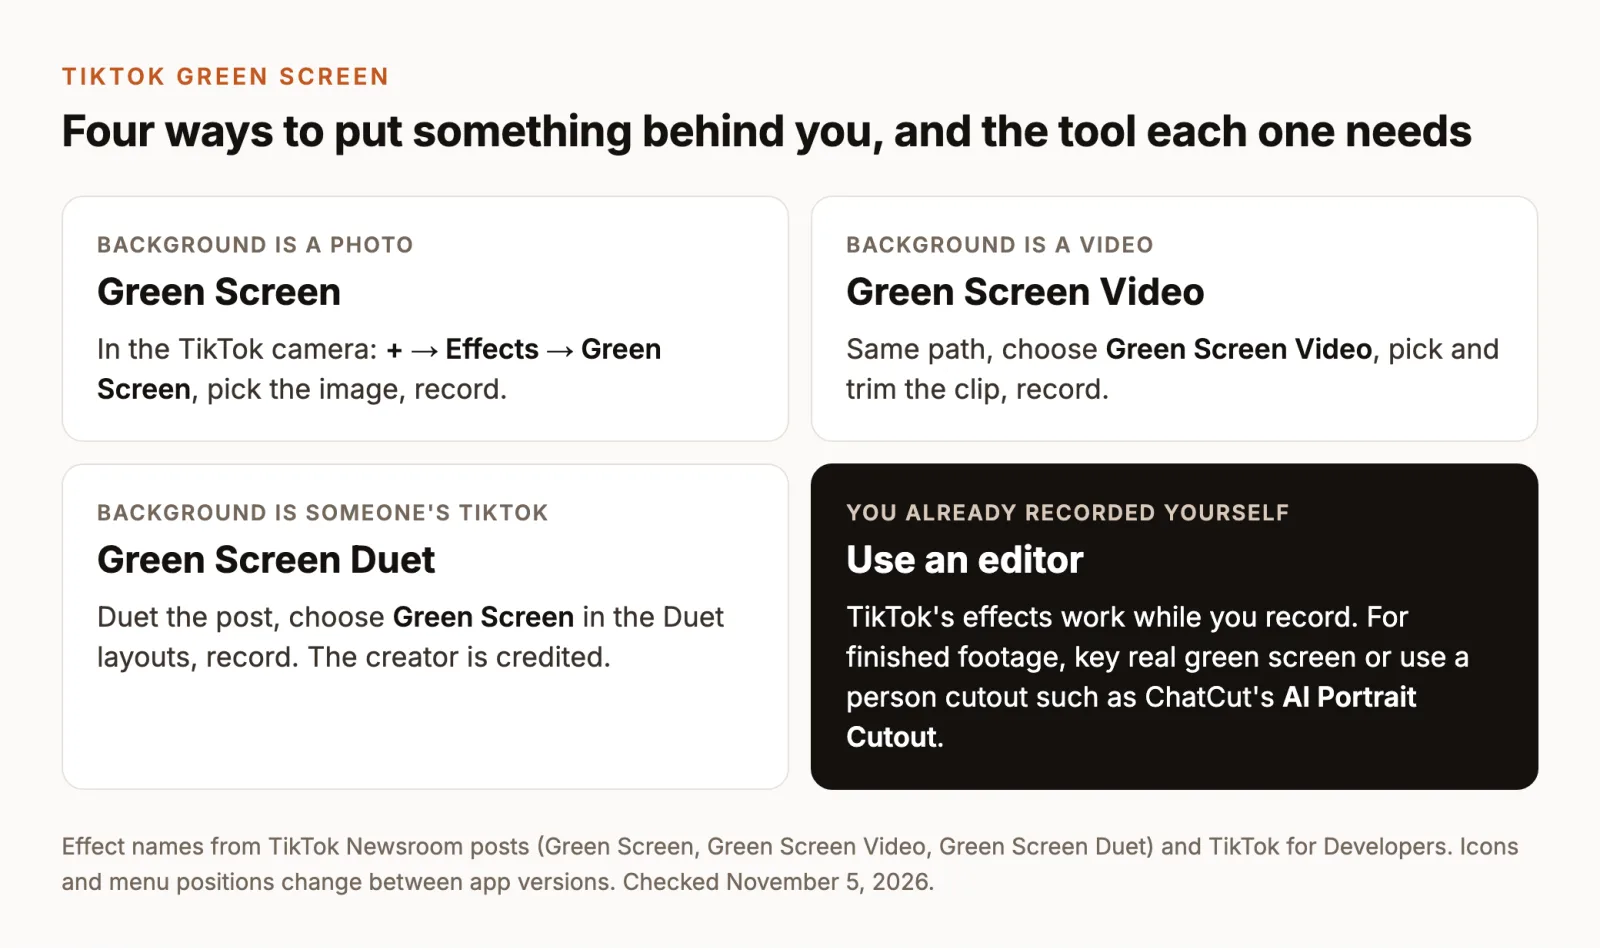
- Pick the right effect. Green Screen uses a photo; Green Screen Video uses a video.
- Choose your background. Select an image or clip from your gallery. TikTok asks for photo access the first time.
- Record and review. Frame yourself, record, then play the take back before posting.
Put a photo behind you with Green Screen
TikTok introduced the Green Screen effect as a way to set your video against any photo in your library, with no physical screen (TikTok Newsroom).
Find the effect
- Tap + to open the camera.
- Tap Effects. TikTok’s announcement placed Green Screen in the Trending tab; in current versions it’s quicker to tap the search icon and type “green screen”.
- Tap Green Screen. Your photos appear along the bottom of the screen.
If TikTok asks for access to your photos, allow it. To change it later on an iPhone, go to Settings → Privacy & Security and choose the category (Apple); on Android, open the app’s permissions in Settings (Google).
Choose the photo and record
- Tap a photo to place it behind you, or open the gallery to choose another one.
- Hold the phone at eye level and step back until your head and shoulders sit in the middle of the frame. The effect needs to see where you end and the room begins.
- Tap record. Stop when you finish a point.
- To change the background for the next part, pick a different photo before you record the next segment.
- Tap the checkmark, then add text, sounds or captions as you would with any TikTok.
For ideas on what to put behind you, TikTok’s Creator Academy has a lesson on green screen content; check the official page for its current advice. Whatever you choose, pick an image that matches your framing. A wide landscape photo gets cropped hard on a vertical screen, so a portrait-orientation image or one with the subject in the middle reads better. Screenshots work well for commentary because the text stays readable behind your shoulder.
Use green screen video on TikTok
Choose a moving background
Green Screen Video works the same way but plays a clip behind you as you record (TikTok Newsroom).
- Tap +, then Effects, and search for “green screen video”.
- Tap Green Screen Video and pick a clip from your gallery.
- If TikTok shows a trim step, choose the part of the clip you want behind you. TikTok’s developer documentation describes this trim step for video backgrounds (TikTok for Developers).
- Record. You appear in front while the clip plays.
When TikTok launched the effect in 2020, it said you could trim up to 60 seconds of a video. TikTok hasn’t published a current limit for the effect that we could find, so treat 60 seconds as historical and check what the trim screen allows on your phone.
Check timing and sound
The background plays while you record, so timing matters. Watch the clip once and note the moment you want to react to, then rehearse your line against it. After recording, play the take back with sound on: check that your voice is clear over anything the background clip adds and that your reaction lands at the right moment. If it doesn’t, delete the segment and record it again.
Use footage you shot or have rights to. A clip you saved from someone else’s post is not yours to reuse, which is what Green Screen Duet is for.
Use another TikTok as the background with Green Screen Duet
Green Screen Duet puts another TikTok behind you. It joined TikTok’s other Duet layouts, such as left and right, react, and top and bottom (TikTok Newsroom). Open the video, start a Duet, and choose Green Screen from the Duet layout options. The original creator is credited in your caption with a link back (TikTok Newsroom). The creator’s Duet settings decide whether you can do this.
Get cleaner edges
TikTok’s effect has to decide, frame by frame, which pixels are you. Most rough edges come from things you can change before you record:
- Light your face from the front. A window or a light behind the phone gives the effect a clear outline. A bright window behind you does the opposite.
- Separate yourself from the room. Stand a step or two forward from the wall, and avoid clothes that match the color of your real background or of the new one.
- Keep the phone still. A tripod or a stack of books beats a hand. Hair, fingers and fast gestures are where edges break first.
- Record a five-second test. Play it back at full screen and look at your hair and hands before you record the real take.
If you’re filming against a real green screen to key in an editor, the rules are stricter. Adobe’s guidance is to light the screen evenly and separately from the subject, keep about 10 to 15 feet between subject and screen to limit green spill, and avoid green clothing (Adobe).
Fix common green screen problems
- The effect isn’t in Effects. Search by name instead of browsing tabs, and update TikTok from the App Store or Google Play. Effect availability can vary by app version and region; for current details, check TikTok’s Help Center.
- Your video doesn’t show up as a background. You opened Green Screen, which takes photos. Switch to Green Screen Video, and the reverse for photos.
- The gallery is empty. TikTok doesn’t have permission to read your photos. Allow access in your phone’s privacy settings (links above), then reopen the camera.
- Edges flicker or eat into you. Add front light, move away from the wall, slow down, and try a plainer background.
- You can’t add green screen to a video you’ve already posted or recorded. TikTok’s announcements describe these as camera effects you apply as you record. To change the background of finished footage, use an editor, as in the next section.
Replace the background of a video you already recorded
Sometimes the recording already exists: a talk you filmed in your office, a tutorial shot in front of a messy shelf, or footage you filmed against a real green screen. TikTok’s camera effects can’t change those, so the background replacement happens in an editor before you upload.
Real green screen or a person cutout
There are two different techniques, and they suit different footage:
- Chroma keying removes one color. It needs footage shot against an evenly lit green or blue screen, and tools such as Premiere’s Ultra Key sample that color and make it transparent (Adobe).
- A person cutout finds the person instead of a color, so it works on footage shot against an ordinary background. That is the kind of tool TikTok’s camera effect is.
ChatCut’s documented tool for this is AI Portrait Cutout, a person cutout. ChatCut’s docs don’t describe a separate key-color control, so for footage shot on a real green screen, an editor with a keyer such as Ultra Key is the documented route; AI Portrait Cutout treats it like any other video with a clearly visible person.
Apply AI Portrait Cutout in ChatCut
AI Portrait Cutout runs in ChatCut Desktop (macOS 13 or later on Apple silicon or Intel, Windows 10 or later x64). The web editor can’t currently display or export its result. These steps follow ChatCut’s AI Background Removal docs:
- Open the project in ChatCut Desktop and place the presenter video on the timeline.
- Open Library → Effects and search for AI Portrait Cutout.
- Drag the effect onto one complete video clip. It doesn’t work on an image, a GIF or part of a clip.
- The first time, Desktop downloads the model it needs. Wait for processing to finish in the Viewer.
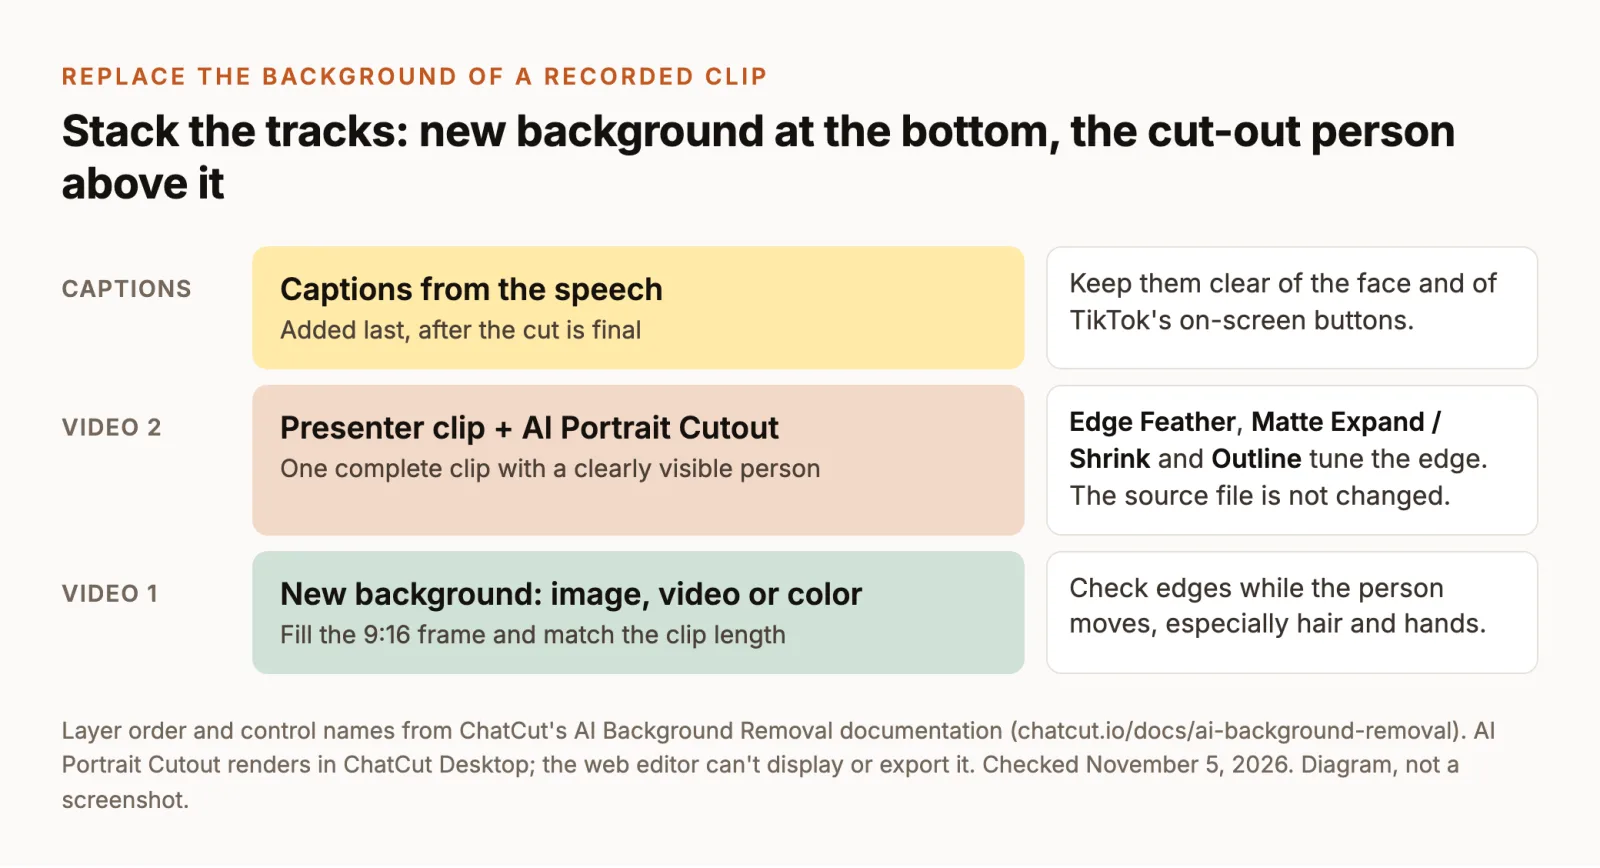
- Select the effect and adjust Edge Feather, Matte Expand / Shrink and Outline if the edges need it.
- Put the new background (an image, a video or a color) on a video track below the presenter, and play it through while the person moves.
The cutout changes only how this timeline item looks. Delete the effect or press Undo to get the original picture back; the source file in My Assets is never changed.
You can also ask the Agent in Desktop to do it. Type @ and pick your clip in place of @presenter-clip:
Then place the new background with a second request, using your own background file in place of @beach-video:
Check: play the result at full screen and watch the hair, the hands and the moment the person turns. If an edge looks hard, raise Edge Feather a little; if a halo of the old room shows, try Matte Expand / Shrink. Agent requests use ChatCut credits (Plans and credits).
Add captions and export for TikTok
With the background in place, add captions so the video works with the sound off. The Add captions Skill transcribes the speech, previews styles on your own clip and applies the one you choose.
Keep the captions clear of the face and of the lower part of the screen, where TikTok places its own buttons and text. Then export from ChatCut Desktop with Export → Video; local export offers presets up to 4K (Desktop local export). Because the cutout only renders on Desktop, export there rather than from the web editor. Our guide on how to make a TikTok video covers vertical framing, length and posting. If the footage is a long podcast or interview, repurposing it into TikToks covers picking the clips first.